Circular Slide Rule Kits |
Neal R. Wagner |
Introduction
-
A friend of mine (Bill Wahrmund) always wanted to teach
children how to use a slide rule. He never tried it, but we thought
about making paper slide rules of some sort. Later I thought
a circular slide rule would be easier to make out of paper and has
other advantages: no need to decide whether to slide left or right.
I then found many web pages online devoted to helping a beginner
construct a circular slide rule. Here is a simple and practical one:
- Circular Slide Rule Instructions. Making a simple circular slide rule.
- Templates. A large number of templates for circular slide rules are given, along with many other templates. The first circular slide rule on this link uses a CD case as the basis for the slide rule.
- Build Slide Rule. Build Your Own Slide Rule! A more complex circular slide rule.
My Own Circular Slide Rule Kit:
-
This page gives my own templates (see below) for constructing
a circular slide rule, with scales C, CI, D, A, and K.
Three Templates in Color:
The template on the left was the first one I worked on. The one in the middle is the same with the scales squeezed together. The template on the right is rearranged for more accuracy with the A and K scales.
 Original: Demo, Inner, Outer, Pointer |
 Shrunk: Demo, Inner, Outer, Pointer |
 Rearranged: Demo, Inner, Outer, Pointer |
Here are the same templates in black, with smaller headers. (Not using up as much ink.)
 Original: Demo, Inner, Outer, Pointer |
 Shrunk: Demo, Inner, Outer, Pointer |
 Rearranged: Demo, Inner, Outer, Pointer |
How the Pictures Were Constructed:
I wrote programs in the Postscript language for these templates. Then I used software to convert them to .pdf form. Here are a few of the Postscript source files. These are for the "Demonstration" versions. To get the others you just comment out a few of the calls to construct parts. Anyone interested in using Postscript in this way can look at my own materials related to learning the Postscript languge: Postscript. After some adjustment, it becomes easier than you might expect.
For the versions in black, I removed all Postscript color stuff, along with a few other simplifications, to get in the middle case:Fancier Circular Slide Rule Kit:
-
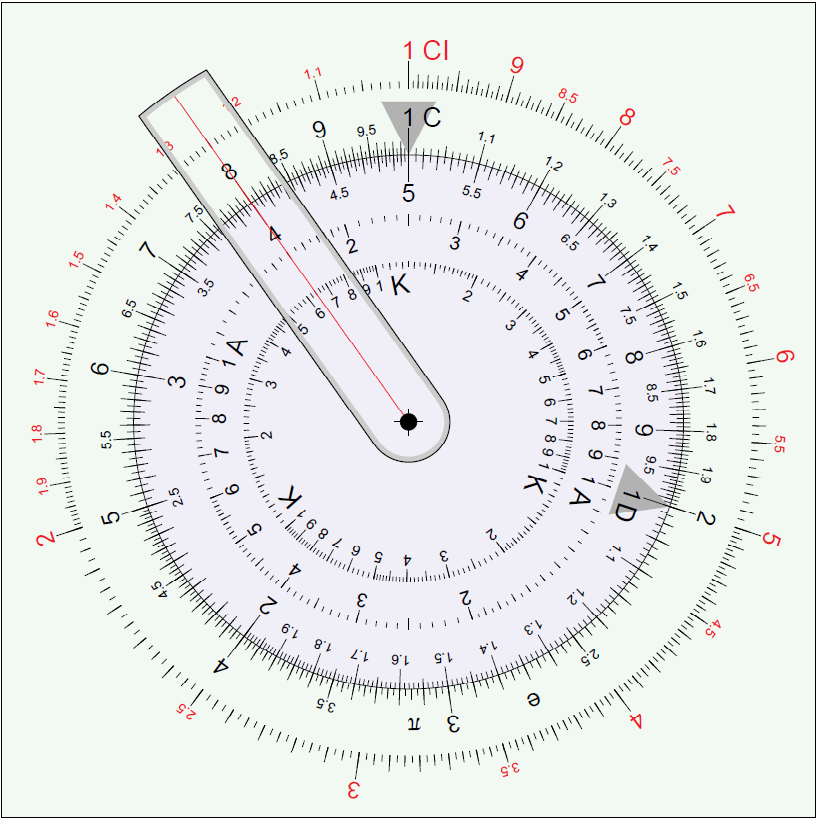
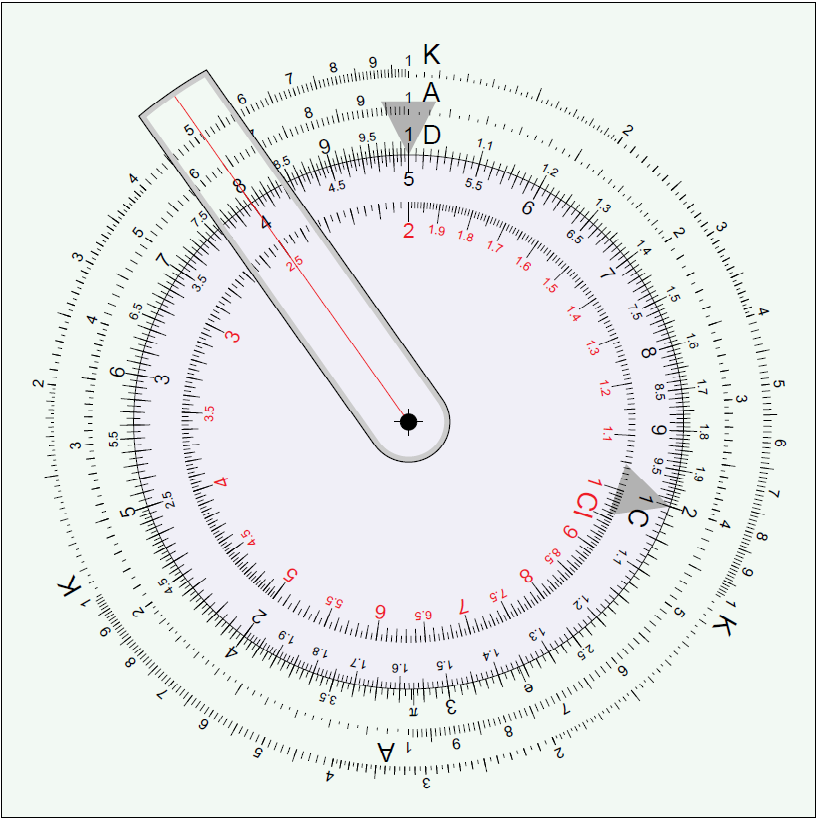
A Professor at Sam Houstan State University, Joel W. Walker, liked
my demonstration of building a circular slide rule, and he created
a much more complex one himself (a fantastic job!). He told me that
he didn't realize how easy it would be to program in "bare" Postcript
and how suitable Postscript would be for this task
(again, check out my
introduction to Postscript):
 |

|
- Circular Slide Rule,
a very complex 300-line Postscrift Program.
If this code looks daunting, impossible to learn to write, you should
realize that Postscript is more like assembler code: not so hard to write
but hard to read. This particular application is very repetitive,
so you mainly have to figure out how to do one scale and move on from there.
I greatly admire Dr. Walker's spiral at the center of his slide rule.
His code is very complex and extremely well-organized, much better
than the Postscript code I write.
- Dr. Walker made it trivial to separate the three parts of
the code, just by commenting out a few function calls (the .ps files below
can be opened in most browsers and can be
converted to .pdf files):
Original:
SR.ps,
SR.pdf
Inner part only: SR.inner.ps, SR.inner.pdf
Outer part only: SR.outer.ps, SR.outer.pdf
Pointer only: SR.pointer.ps, SR.pointer.pdf There is also a section headed by "% draw frame and headers". Commenting out each line of this section (by inserting "%" at the start of each line) gets rid of the frame and external comments. No frame: SR.noframe.ps, SR.noframe.pdf